our blog

How to Clean Up Drywall Dust: A Detailed Guide to Restoring Your Space

Discover expert tips on how to clean up drywall dust efficiently and protect your space. Learn the best methods from American Striping & Commercial Coatings LLC to improve air quality and achieve a spotless result.

After completing a renovation or remodeling project, dealing with drywall dust can feel overwhelming. It seems to get everywhere—on your furniture, floors, walls, and even in the air you breathe. While drywall dust is incredibly fine and easy to disturb, leaving it to linger is not an option. It can trigger allergies, affect indoor air quality, and cause long-term issues if it infiltrates your HVAC system.

But with the right approach and tools, cleaning up drywall dust doesn’t have to be such a headache. Here’s a comprehensive, step-by-step guide to help you tackle drywall dust and leave your space spotless.

Step 1: Prepare Yourself and Your Space

Before you jump into cleaning, preparation is key to protecting yourself and preventing the dust from spreading further.

Wear the Right Gear

Drywall dust can irritate your skin, eyes, and especially your lungs if inhaled. Always wear a dust mask or a respirator, safety goggles, and gloves. For extra protection, consider wearing long sleeves and pants to minimize skin exposure.

Seal Off the Area

One of the biggest mistakes people make is letting drywall dust escape into other areas of their home. Use painter’s tape and plastic sheets to close off doorways, windows, and air vents. This containment will prevent the dust from traveling and settling in areas beyond the room you’re cleaning.

Turn Off the HVAC System

Your heating and cooling systems can easily suck up drywall dust and redistribute it throughout the house. To avoid clogging your filters and spreading dust through the air, switch off your HVAC system until the cleaning is complete. Don’t forget to cover vents with plastic sheeting as an extra layer of protection.

Step 2: Clear Out the Bulk with Dry Sweeping

Once your space is sealed off and you’re suited up, it’s time to tackle the larger clumps of drywall dust that have settled on floors and surfaces. This will make the detailed cleaning steps easier.

Use a Dry Mop or Soft Broom

Start with the floors, sweeping them gently with a dry microfiber mop or a soft-bristled broom. Avoid sweeping too quickly, as this can stir up dust into the air. Instead, go slow and steady, gathering the dust into piles that can easily be collected later. Microfiber mops work especially well because they trap the dust rather than pushing it around.

Don’t Forget High Surfaces

Dust doesn’t just settle on the floor. It gets on countertops, shelves, and even walls. Use a dry microfiber cloth or duster to clean these areas, paying special attention to windowsills and baseboards where dust tends to accumulate. Remember to dust light fixtures and ceiling fans, as these often harbor a surprising amount of drywall dust.

Step 3: Vacuum with Precision – Use a HEPA Filter

Once the large clumps of drywall dust have been collected, it’s time to remove the finer particles with a vacuum. However, not all vacuums are created equal when it comes to drywall dust cleanup.

Choose a Vacuum with a HEPA Filter

A standard vacuum cleaner may seem like an easy solution, but without a HEPA filter, you could end up blowing fine dust particles back into the air. HEPA filters are designed to capture particles as small as drywall dust, preventing them from becoming airborne. Whether you have carpets, tile, or hardwood floors, a HEPA-filtered vacuum is essential for this job.
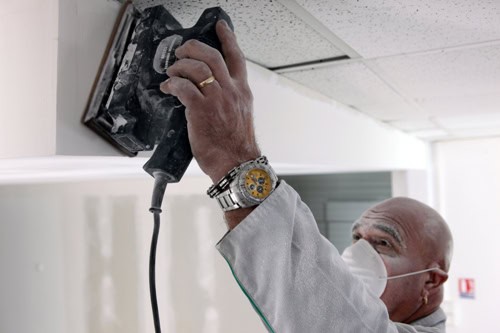

How to Clean Up Drywall Dust

Start with the Floors

Begin by vacuuming the floors slowly and thoroughly. Move methodically to ensure you capture all the dust, especially along the edges of the room, where dust tends to hide. For carpeted areas, make several passes to ensure you’re lifting all the dust from deep within the fibers.

Vacuum Walls and Other Surfaces

Don’t skip the walls! Drywall dust often clings to vertical surfaces. Use your vacuum’s brush attachment to gently vacuum walls, baseboards, windowsills, and other flat surfaces. Even furniture can be vacuumed if necessary.

Step 4: Wipe Down Surfaces with a Damp Cloth

Even after vacuuming, there will likely be some remaining dust, especially on flat surfaces. At this stage, it’s time to break out the microfiber cloths and water.

Tackle Hidden Areas

Pay special attention to often-overlooked areas like behind furniture, in corners, and on top of door frames. Dust loves to settle in these spots.

Clean in One Direction

As you wipe, move in one consistent direction. Going back and forth can just redistribute the dust. When your cloth gets dirty, rinse it in clean water, wring it out, and continue.

Use a Damp Microfiber Cloth

Drywall dust is very fine, and dry cloths alone won’t pick it all up. Dampen a microfiber cloth with water (just a little, not soaked) and wipe down all surfaces. This includes countertops, furniture, walls, windowsills, and appliances. Microfiber is ideal because it traps dust instead of moving it around.

Step 5: Mop the Floors for a Final Clean

Now that the surfaces are cleaned, it’s time to give the floors their final cleaning to remove any dust that may have been missed during vacuuming.

Final Vacuum Run (Optional)

If you feel that some dust remains after mopping, a quick vacuum run can help ensure your floors are spotless.

Add a Cleaning Solution

For more stubborn dust or larger spaces, you may want to use a mild cleaning solution. However, avoid harsh chemicals that might react with drywall dust, creating a muddy residue.

Use Fresh Water

Fill a mop bucket with clean water and mop the floors thoroughly. Be sure to change the water frequently, as drywall dust will quickly dirty it. Using dirty water will just spread the dust around rather than removing it.

Step 6: Air Purifiers and Final Checks

At this stage, most of the visible dust should be gone, but drywall dust can linger in the air and settle again if not properly addressed.

Inspect the Space

Walk through the room and inspect for any missed spots. Check high corners, behind appliances, and other overlooked areas. If necessary, repeat the cleaning process for any areas that still have visible dust.

Replace Air Filters

Your HVAC system likely captured some drywall dust during the project, so it’s crucial to replace the air filters once the cleaning is done. Fresh filters will ensure that the dust doesn’t circulate back into the room through your heating or cooling system.

Run an Air Purifier

A HEPA-filtered air purifier can help clear the air of any remaining drywall dust particles. Let it run for a few hours after your cleaning session, especially in rooms where you’ve done significant drywall work. This will improve air quality and capture any floating dust that could settle back onto clean surfaces.

Extra Tips for Drywall Dust Cleanup

Don’t Use a Regular Vacuum

Standard household vacuums without HEPA filters aren’t designed to capture fine drywall dust. Using one could just blow the dust back into the air, making your job harder in the long run.

Repeat the Process If Needed

For large projects, you may need to clean twice to ensure all the dust is removed. The second pass often catches what the first didn’t.

Protect Air Vents

If you need to turn on your HVAC system before fully cleaning, cover the air vents with cheesecloth to act as a filter and prevent dust from entering the ducts.

Clean as You Go

If you’re in the middle of a long-term project, try to clean up drywall dust as you go. Regular sweeping and vacuuming will reduce the overall mess and make the final cleanup easier.

Conclusion

Cleaning up drywall dust may seem like a daunting task, but with the right tools and methods, it’s entirely manageable. By preparing your space, using a HEPA-filtered vacuum, and methodically cleaning every surface, you can eliminate this fine dust and restore your home or workspace to a clean, healthy state. Don’t forget to protect your HVAC system, replace air filters, and run an air purifier to catch any lingering particles. Following these steps will ensure that you remove drywall dust quickly and effectively, leaving your space dust-free and safe.

Cleaning up drywall dust can be a time-consuming and delicate process, but with the right approach, it doesn’t have to be overwhelming. If you’re tackling a large project or simply want professional assistance to ensure the job is done right, American Striping & Commercial Coatings LLC is here to help. Our expert team specializes in thorough, effective clean-up services for residential and commercial properties. Whether you’re dealing with drywall dust or other post-construction mess, we have the tools and expertise to restore your space.

Contact us today to schedule a consultation or learn more about our full range of services. Let us handle the dirty work so you can enjoy a clean, dust-free environment without the hassle.